
How To
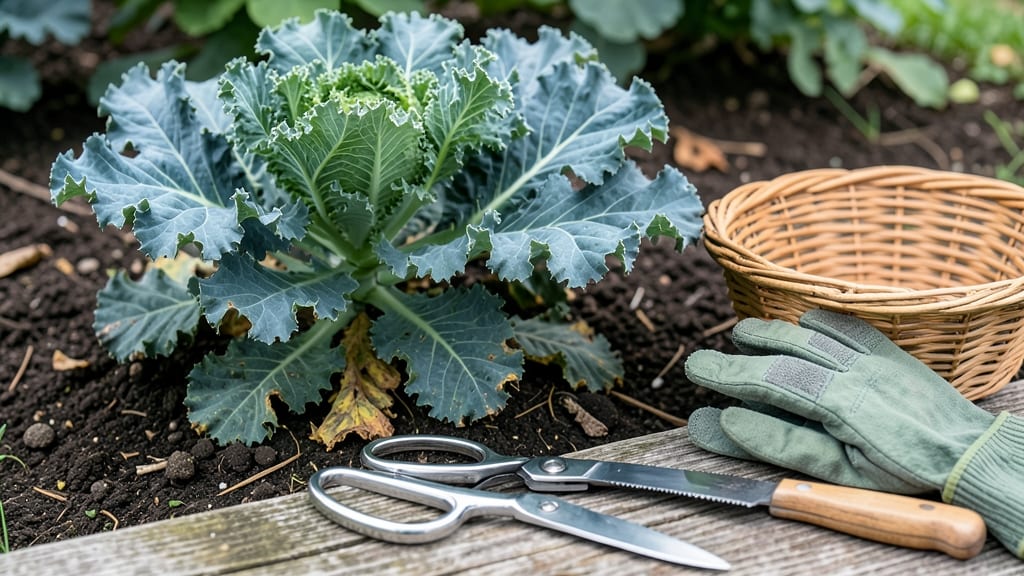
To pick kale from your garden the right way means harvesting leaves without killing the plant—something even experienced gardeners mess up.
That one critical mistake most people make is cutting too close to the stem or pulling whole leaves, which stunts regrowth. The trick is to harvest outer leaves first, leaving the inner ones to keep growing. Once you master this, your kale plant becomes a year-round green machine.
Here’s how to do it: start when leaves reach 6-8 inches, use clean shears to snip just above the stem, and avoid over-harvesting. I’ll walk you through the best techniques, seasonal timing, and how to store your harvest so it stays crisp and fresh.
Whether you’re a beginner or a seasoned gardener, these tips will help you keep your 🥬 kale thriving and producing well into winter.


Leaf-by-leaf kale harvesting: the right way to prune for continuous growth
Kale is one of the most rewarding cool-season crops because it keeps producing even after you start harvesting. The key to continuous growth lies in how you pick those outer leaves—cutting too much or in the wrong way can shock your plant and reduce future yields.
I’ve learned the hard way that leaf-by-leaf harvesting isn’t just about getting fresh greens; it’s about preserving your kale’s health for months of harvests.
When I first grew kale, I made the classic mistake of snipping entire stems or pulling leaves too aggressively. This left jagged stems and stressed the plant, slowing down regrowth. Now, I follow a gentle pruning method that mimics how the plant naturally grows.
The goal is to remove only mature outer leaves while leaving the inner growth point intact—this way, your kale keeps producing new leaves for weeks, even months.
Here’s the secret: harvest from the outside in. Kale grows in a rosette pattern, with older leaves on the outside and younger ones in the center. By always cutting the largest, most mature leaves first, you encourage the plant to focus its energy on replacing them.
This method works for curly kale, lacinto, and red Russian varieties alike.
How to Pick Kale Leaves Without Damaging the Plant
- 1 Choose the right leaf: Select fully grown outer leaves that are at least 6-8 inches long and deep green (or purple/red for varieties). Avoid leaves that are yellowing or tough.
- 2 Use clean, sharp scissors: Grab a pair of sterilized pruning shears or sharp kitchen scissors. Dull tools crush stems and invite disease.
- 3 Cut at a 45-degree angle: Make your cut about 1 inch above the stem where the leaf attaches. This prevents water from pooling and rotting the stem.
- 4 Leave the center intact: Never cut into the inner rosette or the main stem. This is where new leaves grow—protect it!
- 5 Harvest in the morning: Pick leaves when they’re firm and hydrated (early morning after dew dries). This ensures the best flavor and texture.
- 6 Space out harvests: Wait 2-3 weeks between harvests to let the plant recover. In ideal conditions, a single kale plant can produce for 6-8 weeks or longer!
One of the biggest misconceptions about harvesting kale is that you should pull the entire leaf off. This can damage the stem and slow down regrowth. Instead, think of yourself as a gentle gardener—you’re not stripping the plant bare; you’re giving it a haircut.
The goal is to remove just enough to encourage new growth while keeping the plant healthy.
Timing your harvests is just as important as how you cut. I’ve found that spring and fall are the sweet spots for kale production. In spring, harvest when leaves reach 6-8 inches and the plant is actively growing.
In fall, keep harvesting until the first hard frost, as kale actually sweetenens after a light frost. Even in winter, you can harvest leaves from cold-hardy varieties like Winterbor or Vates by cutting through any protective mulch or snow.
After each harvest, give your kale a little post-harvest care to speed up recovery. Water the base of the plant deeply to replenish moisture lost during cutting.
If your soil is nutrient-rich, you might not need to fertilize immediately, but a light application of compost tea can give it a boost. Avoid heavy fertilizers right after harvesting, as they can burn the plant’s tender new growth.
I once had a kale plant that looked like it was giving up after my third harvest—until I realized I’d been cutting too close to the center. Once I adjusted my technique to leave the inner leaves untouched, that same plant produced for another 6 weeks.
That’s the power of proper leaf-by-leaf harvesting: it turns a single plant into a year-round green machine.
For container-grown kale, the same rules apply, but you’ll need to be even more careful. Since pots have limited space, over-harvesting can stress the plant faster. Stick to 1-2 leaves per harvest and monitor the plant’s health closely.
With the right approach, even a 5-gallon pot can yield enough kale for a small family.
When and how often to harvest kale for year-round production
Timing your kale harvest correctly is the secret to enjoying fresh greens for months. Unlike many vegetables, kale keeps producing new leaves as long as you follow the right schedule.
The best time to harvest is when leaves reach 6-8 inches long—this ensures tender texture while leaving enough growth for regrowth. Spring-planted kale typically hits this stage around 50-70 days after sowing, while fall varieties may mature slightly faster in cooler weather.
For year-round production, aim to harvest kale every 1-2 weeks during its peak growing season (spring through early fall). In winter, when growth slows, extend your harvest interval to every 3-4 weeks to avoid stressing the plant.
The key is balance: too frequent harvesting weakens the plant, while waiting too long lets leaves become tough and bitter. Always prioritize outer leaves first—they’re fully mature while inner leaves stay tender for future harvests.
| Season | Ideal Harvest Frequency | Leaf Size | Regrowth Window |
|---|---|---|---|
| Spring (April-June) | Every 7-10 days | 6-8 inches | 3-5 weeks |
| Summer (July-August) | Every 10-14 days | 7-10 inches | 4-6 weeks |
| Fall (September-November) | Every 7-14 days | 5-7 inches | 3-4 weeks |
| Winter (December-February) | Every 3-4 weeks | 4-6 inches | 6-8 weeks |
Extend your harvest into winter by protecting plants with row covers or straw mulch—this buys you 2-3 extra months of production. Kale thrives in cold weather, often tasting sweeter after a light frost.
Look for leaves with deep color and crisp edges—these are ready to pick. Avoid harvesting when soil is frozen; wait until temperatures rise above 32°F (0°C) to prevent damage to the crown.
One common mistake is harvesting the entire plant at once. Instead, use clean pruning shears to snip individual leaves 1 inch above the stem. This encourages bushier growth and prevents the plant from bolting.
For curly kale varieties, focus on harvesting from the outer edges inward—this maintains the plant’s compact shape while keeping inner leaves tender.
To maximize regrowth, fertilize lightly with compost or balanced fertilizer after each harvest. Kale is a heavy feeder, so replenish nutrients every 4-6 weeks during active growth.
Water deeply 1-2 times per week, keeping soil consistently moist but not waterlogged. In drought conditions, reduce harvest frequency to let the plant recover.
With the right timing and care, a single kale plant can produce harvests for 6-8 months. Start by testing a few leaves, then adjust your schedule based on regrowth speed. By winter, you’ll have a hardy, productive plant ready to supply your kitchen—no greenhouse required!