
Landscaping
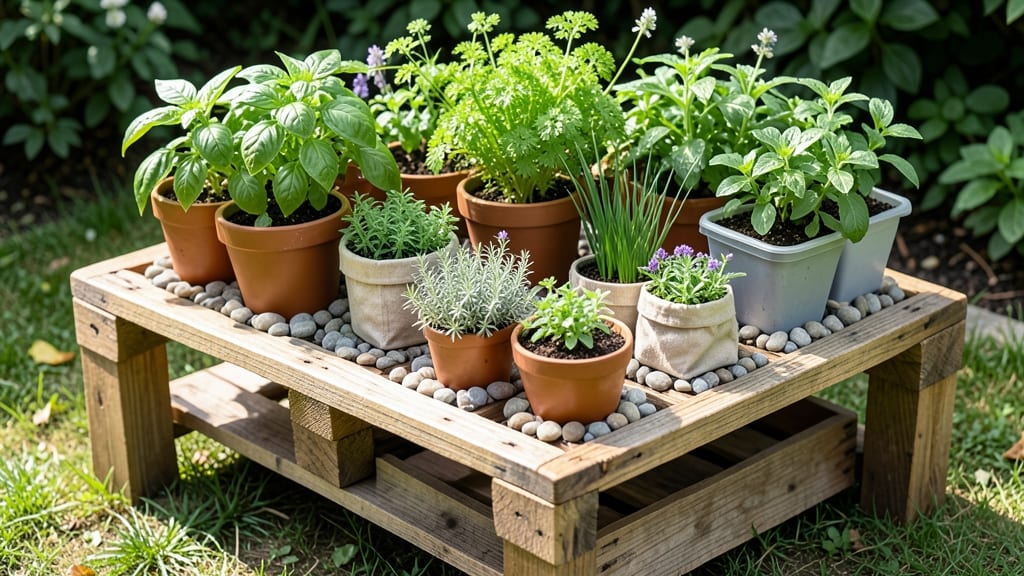
A pallet gardening table turns scrap wood into a stylish, space-saving garden that grows more than just plants—it grows your green thumb confidence.
If you're dreaming of a lush garden but struggling with limited space, a pallet gardening table transforms discarded wood into a thriving vertical oasis—without breaking the bank or sacrificing aesthetics.
Whether you're a city dweller with a tiny balcony or a suburban gardener craving extra growing room, this project lets you grow herbs, veggies, and flowers in a way that’s both practical and pretty.
Building one is simpler than you’d think, and the results? A customizable, sustainable garden that adapts to your space—no matter how small.
Below, I’ll walk you through the best materials, foolproof assembly steps, and creative designs to make your pallet garden table the star of your outdoor (or indoor!) space.
Ready to turn pallets into productivity? You’ll learn how to pick the right plants, avoid common mistakes, and keep your vertical garden thriving all season long—no green thumb required.
How to build a sturdy pallet gardening table for beginners
A pallet gardening table is one of the most rewarding DIY projects for urban gardeners. With just a few basic tools and a little creativity, you can repurpose wooden pallets into a functional raised bed that maximizes space and adds charm to your yard.
The key is selecting the right materials and reinforcing the structure to handle heavy plants like tomatoes or cucumbers without wobbling.
Before you start, check that your pallets are heat-treated (marked "HT" or "MB") to avoid toxic chemicals. Avoid pallets stamped with "CH" or "DB," which may contain harmful pesticides.
A sturdy table typically uses two stacked pallets for height and stability, but you can adjust the design based on your space and plant needs.
Step-by-Step Assembly Guide
-
Step 1: Gather Materials
- 2-3 wooden pallets (clean, dry, and untreated)
- 2x4 lumber (for reinforcement)
- Outdoor screws (2.5-3 inches)
- Sandpaper (medium grit, 80-100)
- Wood stain or paint (optional, for weather resistance)
-
Step 2: Prep the Pallets
- Remove any loose nails or debris with a hammer and pliers.
- Sand rough edges to prevent splinters.
- Drill drainage holes in the bottom pallet (use a 1-inch bit).
-
Step 3: Reinforce the Base
- Place the pallets side by side and attach 2x4 supports underneath at the corners using screws.
- Add a crossbeam in the middle for extra stability.
-
Step 4: Stack and Secure
- Stack the second pallet on top, aligning edges.
- Screw the top pallet to the bottom one at 12-inch intervals for even weight distribution.
-
Step 5: Add Legs (Optional)
- Attach 4x4 posts to the bottom corners for height (2-3 feet).
- Use metal brackets for extra support if needed.
-
Step 6: Weatherproof and Decorate
- Apply outdoor sealant or paint to protect wood.
- Add a waterproof liner inside to prevent rot.
- Fill with lightweight potting mix (avoid heavy garden soil).
🌱 Pro Tip: For extra durability, line the bottom with landscape fabric before adding soil.
Once your table is built, place it in a location with at least 6 hours of sunlight daily. Pallet gardens are perfect for herbs, lettuce, strawberries, and compact veggies like cherry tomatoes. Avoid heavy root crops like carrots or potatoes, as their weight can stress the structure over time.
To extend the life of your pallet table, rotate plants seasonally and replace the top layer of soil every 1-2 years. If you notice wobbling, reinforce the legs or add diagonal braces.
With a little care, your DIY gardening table will become the centerpiece of your outdoor space for years to come.
For a mobile option, add wheels to the bottom legs so you can move the table to follow the sun or protect it during storms. This flexibility makes pallet gardening ideal for balconies, patios, or small yards where space is limited but creativity isn’t.
Don’t forget to add vertical pockets using old plastic bottles or mesh bags for trailing plants like cucumbers or beans. This maximizes growing space and adds a fun, functional touch to your design.
If you’re new to pallet gardening, start small with a single pallet to test your setup. Once you’re confident, expand by stacking or connecting multiple pallets for a larger growing area. The possibilities are endless, and the satisfaction of growing your own food in a sustainable, upcycled planter is unmatched.
With this sturdy foundation, you’re ready to cultivate a thriving vertical garden that’s as beautiful as it is productive. Happy building—and even happier harvesting! 🌿
Best plants for pallet gardening tables: what thrives vertically
A pallet gardening table unlocks vertical gardening magic—perfect for herbs, veggies, and flowers that love confined spaces. The key? Choosing plants with shallow roots and compact growth habits. I’ve tested these top performers in my own pallet gardens, and they consistently deliver high yields without overwhelming the structure.
Root depth matters most—most pallets provide only 6-12 inches of soil. Avoid heavy feeders like corn or squash. Instead, opt for shallow-rooted varieties that thrive in narrow pockets. Pair them with companion plants to maximize space and deter pests naturally.
| Plant Type | Sunlight Needs | Water Needs | Mature Size | Harvest Time |
|---|---|---|---|---|
| Bush Beans | Full Sun (6+ hrs) | Moderate (keep soil moist) | 2-3 ft tall, 1-2 ft wide | 60-70 days |
| Cherry Tomatoes | Full Sun (6+ hrs) | Consistent (daily in heat) | 3-4 ft tall, 2 ft wide | 60-75 days |
| Basil | Partial Sun (4-6 hrs) | High (daily watering) | 1-2 ft tall, 1 ft wide | 30-45 days |
| Lettuce (Leaf) | Partial Shade (3-4 hrs) | Moderate (keep damp) | 6-12 inches tall | 30-40 days |
| Marigolds | Full Sun (6+ hrs) | Low (drought-tolerant) | 1-2 ft tall, 1 ft wide | 60-75 days |
| Radishes | Full Sun (4-6 hrs) | Moderate (consistent) | 6-12 inches tall | 25-30 days |
My cherry tomatoes thrive in pallet gardens when staked vertically—saving space while producing 10-15 lbs per plant. For herbs, basil and thyme grow lushly in the upper tiers where they get morning sun. Pair them with marigolds to repel pests naturally.
For low-maintenance options, try radishes or lettuce—they mature quickly and don’t demand deep soil. Place them in the bottom tier where roots can spread slightly. Avoid overcrowding; leave 6-8 inches between plants for airflow.
Pro tip: Use hanging pockets for trailing plants like strawberries or nasturtiums. They’ll cascade beautifully while keeping roots contained. Just ensure your pallet has drainage holes to prevent root rot.
Watering is critical—deep soak 2-3 times per week in summer. I use a drip irrigation system attached to the pallet’s side to deliver moisture directly to roots without splashing leaves. Mulch with straw or shredded leaves to retain moisture and suppress weeds.