
Container Gardens
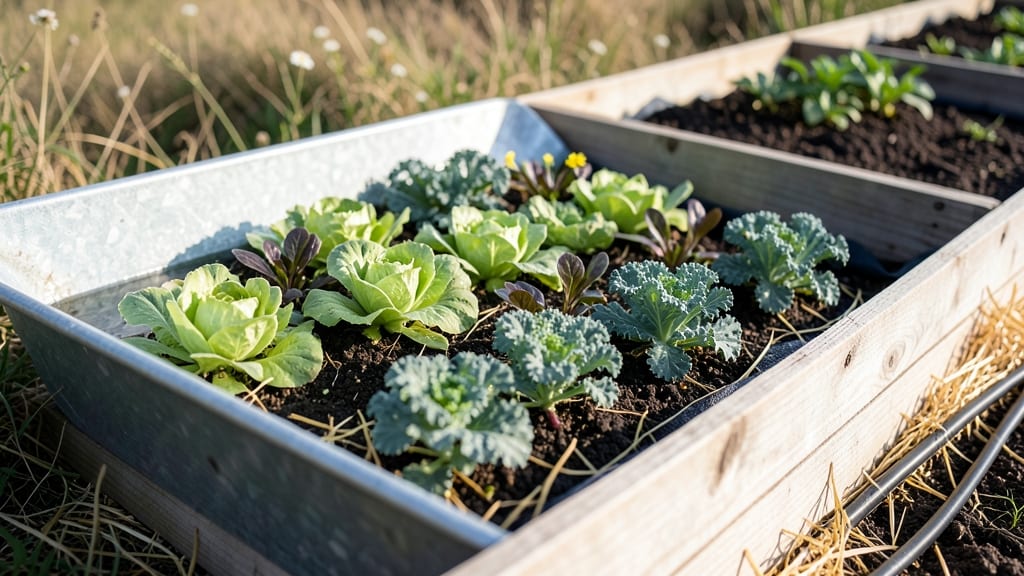
Repurposing water troughs into raised garden beds 🌱 unlocks a world of space-saving, low-cost gardening that’s perfect for small yards or urban spaces.
Picture this: a sturdy metal or plastic trough, lined with drainage, brimming with herbs, lettuce, or even dwarf tomatoes—all within arm’s reach. No expensive lumber, no heavy lifting, just a clever twist on what was once a livestock waterer.
The best part? These beds stay dry, drain well, and can be stacked or arranged in ways that maximize every square foot of your outdoor area.
Whether you’re dealing with limited space, poor soil, or just love the idea of growing more without the hassle, water trough garden beds are a game-changer. They’re durable, customizable, and—once you see how easy they are to set up—you’ll wonder why you didn’t try them sooner.
Below, I’ll walk you through 8 creative layouts, the best plants to grow in them, and step-by-step tips to turn your old troughs into thriving, high-yield garden beds that look as good as they perform.
How to convert water troughs into functional raised garden beds
Old water troughs can become stunning, space-efficient raised garden beds with just a few modifications. These containers offer excellent drainage and can be customized to fit any garden style. Whether you're working with plastic, metal, or rubber troughs, the process is straightforward and rewarding.
The key is ensuring proper drainage, soil quality, and plant selection tailored to your trough's dimensions.
Before you begin, gather your materials: a clean water trough, garden soil, compost, drainage materials like gravel or landscape fabric, and your chosen plants. Safety first—wear gloves and goggles when cutting or handling heavy materials.
Start by cleaning the trough thoroughly to remove any debris or residue that could harm your plants. A simple scrub with soapy water and a rinse with vinegar will do the trick for most materials.
Step-by-Step Guide to Repurposing Water Troughs
- Step 1: Clean and Inspect – Scrub the trough with soapy water and rinse with vinegar. Check for cracks or weak spots that need reinforcement.
- Step 2: Cut Access Holes – Use a jigsaw or hole saw to create planting holes. Space them 12-18 inches apart for optimal plant growth.
- Step 3: Add Drainage Layer – Line the bottom with 1-2 inches of gravel or broken pottery pieces to prevent waterlogging.
- Step 4: Line if Needed – For plastic troughs, use landscape fabric to prevent soil from leaking out.
- Step 5: Fill with Soil – Mix 60% garden soil, 30% compost, and 10% perlite for ideal drainage and nutrients.
- Step 6: Plant Strategically – Choose shallow-rooted plants like herbs, lettuce, or strawberries. Place taller plants at the back.
- Step 7: Water and Mulch – Water thoroughly after planting and add 2 inches of mulch to retain moisture.
Drainage is critical in water troughs because they lack the natural soil drainage of in-ground beds. Start by adding a 1-2 inch layer of gravel or broken terracotta pots at the bottom. This layer ensures excess water flows out while keeping roots stable.
For plastic troughs, consider adding a landscape fabric layer on top of the gravel to prevent soil from mixing in. Metal troughs may need extra reinforcement if they're lightweight or prone to warping under soil weight.
Soil selection makes all the difference in your trough garden's success. A mix of 60% garden soil, 30% compost, and 10% perlite or vermiculite creates the perfect balance of nutrients, aeration, and moisture retention. Avoid heavy clay soil, which can compact and suffocate roots.
If your trough is deep, you can layer the soil mix with a slow-release fertilizer to provide nutrients over time. For shallow troughs, top-dress with compost every few weeks to replenish nutrients.
When selecting plants, prioritize varieties that thrive in containers and have shallow root systems. Herbs like basil and thyme, leafy greens such as lettuce and spinach, and strawberries or cherry tomatoes are excellent choices.
Avoid deep-rooted plants like carrots or potatoes unless your trough is at least 12 inches deep. Group plants with similar water needs together to simplify maintenance. For example, place drought-tolerant herbs near the edges where they may dry out faster.
Place your trough in a location that receives at least 6 hours of sunlight daily. Most vegetables and herbs need full sun to thrive, but some leafy greens can tolerate partial shade.
If you're using a metal trough, be mindful of heat absorption—it can scorch plant roots on hot days. Elevate the trough slightly off the ground with bricks or cinder blocks to improve airflow and prevent water pooling underneath. This also makes harvesting easier and reduces pest access.
After planting, water thoroughly to settle the soil and encourage root growth. Stick your finger 1-2 inches into the soil—if it feels dry, it's time to water. In hot climates, you may need to water daily, while cooler weather might only require watering every few days.
Mulching with straw or shredded leaves helps retain moisture and suppress weeds. Avoid overwatering, as troughs are prone to waterlogging, which can lead to root rot.
Maintenance is minimal once your trough garden is established. Monitor for pests like aphids or slugs and address them early with organic sprays or barriers. Rotate crops annually to prevent soil depletion and disease buildup.
If your trough shows signs of wear, reinforce weak spots with additional gravel or a new layer of landscape fabric. With proper care, your repurposed water trough can produce a bountiful harvest for years to come.
Get creative with your trough garden by adding decorative elements like painted troughs, colorful mulch, or small solar-powered lights. These touches enhance your garden's aesthetic while keeping the focus on your thriving plants.
Whether you're growing herbs for cooking, flowers for pollinators, or vegetables for fresh meals, your water trough raised bed will be a standout feature in any garden.
8 Space-saving water trough garden bed layouts for small yards
Small yards don’t mean small harvests! With water trough raised garden beds, you can maximize every square inch using creative layouts that play with vertical space and companion planting. These designs transform basic troughs into high-yield, space-efficient gardens perfect for herbs, greens, and even small fruits.
The key is leveraging tiered structures, multi-level arrangements, and strategic plant pairings to boost productivity without sprawling footprints.
My favorite layouts combine functional drainage with aesthetic appeal, using materials like cinder blocks, wooden pallets, or stacked troughs to create custom heights. For example, a two-tiered trough can double your growing area while keeping maintenance simple.
Below, I’ve outlined 8 proven configurations, each optimized for different yard sizes and gardening goals—from herb spirals to salad towers. The comparison table breaks down their space efficiency, plant compatibility, and yield potential so you can pick the perfect fit.
| Layout Name | Space Used | Best Plants | Yield Potential | Maintenance |
|---|---|---|---|---|
| Single-Trough Herb Spiral | 3' x 1' footprint | Basil, Thyme, Parsley | High (year-round) | Low (self-watering) |
| Two-Tiered Salad Tower | 2' x 2' footprint | Lettuce, Spinach, Radishes | Very High (3 crops/year) | Medium (succession planting) |
| Pallet-Stacked Pepper & Tomato | 4' x 1.5' footprint | Cherry Tomatoes, Peppers | High (summer harvest) | High (staking needed) |
| Corner Pocket Planter | 1.5' x 1.5' footprint | Green Onions, Carrots, Microgreens | Moderate (fast turnover) | Low (shallow roots) |
| Hanging Trough Vine Garden | 2' x 1' footprint | Cucumbers, Beans, Nasturtiums | Moderate (vertical growth) | Medium (pruning required) |
| Cinder Block Tiered Bed | 3' x 2' footprint | Strawberries, Mint, Chives | Very High (perennial crops) | Low (mulching helps) |
| Window Box Trough Combo | 2' x 1' footprint | Dill, Cilantro, Chervil | High (cut-and-come-again) | Medium (regular harvesting) |
| Underground Trough Planter | 4' x 1' footprint | Potatoes, Beets, Turnips |