
Picking
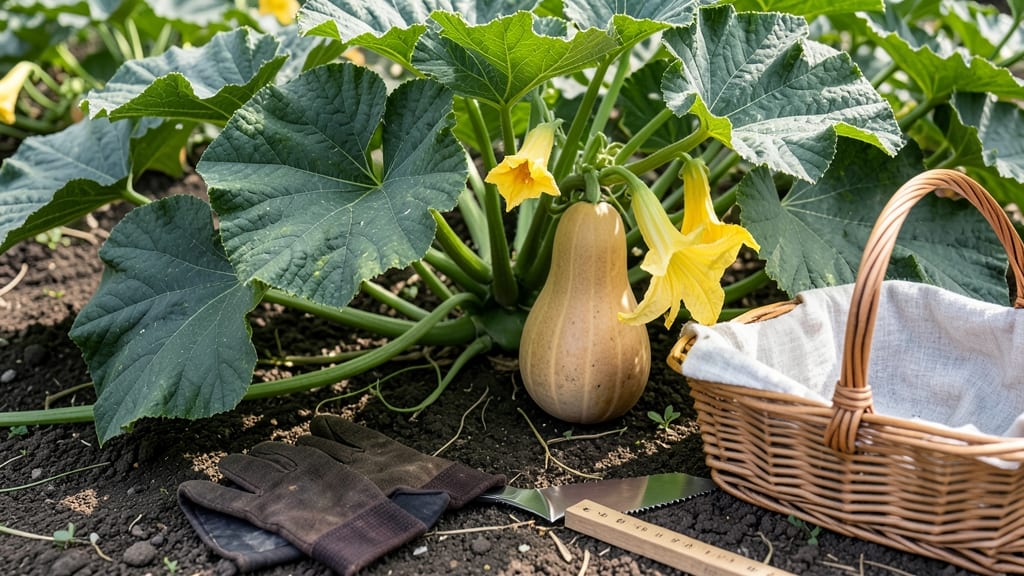
Knowing when to harvest butternut squash from the garden ensures a sweet, flavorful harvest—wait too long, and you risk losing quality to frost or overripening.
Picture this: you’ve nurtured your plants all season, and now the moment of truth arrives. One wrong move, and that velvety texture turns to mush. The good news? There are three foolproof signs to tell you when your squash is ready to pick.
From skin color shifts to stem changes, these visual cues make it easy to avoid the most common mistakes—like harvesting too early or ignoring weather warnings. Below, I’ll walk you through exactly what to look for, plus how to handle and store your squash for maximum shelf life.
Ready to turn your garden into a harvest of golden perfection? Let’s dive into the ideal timing and techniques that’ll keep your butternut squash tasting fresh for months.
3 Visual and physical signs your butternut squash is ready for harvest
Harvesting your butternut squash at the right time ensures maximum flavor, sweetness, and storage potential. Unlike some squash varieties, butternuts don't ripen off the vine, so timing is everything. Missing these 3 key indicators could mean sacrificing that perfect velvety texture and rich, nutty taste you're craving.
I've learned the hard way that waiting too long can turn your squash into a mealy, waterlogged disappointment, while harvesting too early leaves you with bland, underdeveloped fruit. The good news?
Nature gives us clear signals when these winter squash are ready to pick. Let's explore the visual and physical cues that guarantee you're harvesting at peak perfection.
-
1. Skin Color Transformation
Look for the rind to change from matte green to a deep tan or beige color. This color shift indicates the squash has fully matured and developed its signature sweetness. The color should be consistent across the entire surface, not just in patches. -
2. Stem Drying and Detachment
The stem (or vine) should begin drying out and pull away slightly from the squash. When you gently tug, it should separate easily from the main vine. This indicates the plant is redirecting nutrients to the fruit, signaling it's ready for harvest. A fresh, green stem means more time is needed. -
3. Rind Firmness Test
Press your fingernail into the rind. If it doesn't pierce easily and feels hard like a baseball, your squash is ready. For extra confirmation, tap two squash together - the ripe one will make a hollow, mature sound. A soft, yielding rind means it needs more time on the vine.
Don't overlook the size comparison either. A properly mature butternut squash typically weighs between 3-5 pounds, though some varieties can reach up to 10 pounds. The fruit should feel heavy for its size, another sign of proper maturation and sweetness development.
I always compare my squash to store-bought ones - if yours is noticeably smaller but firm, it might need more time.
Seasonal timing also plays a crucial role. In most USDA Zone 6a regions, butternut squash reach harvest readiness between 90-100 days after planting, typically in late September or early October. However, local climate variations mean you should prioritize the visual cues over calendar dates.
A hard frost will ruin your squash, so if you're approaching your first frost date and haven't seen these signs, it's time to harvest regardless.
One common mistake I see is confusing skin color with ripeness. Some butternut varieties maintain green shoulders even when ripe - don't let this fool you. Always check the neck area where the stem attaches, as this is where color changes become most apparent.
The skin should be hard and difficult to puncture with your thumbnail, not soft or yielding.
Pro tip: If you're still unsure, harvest one squash and test it. Cut it open - ripe butternut squash has bright orange flesh with a dense, dry texture.
Underripe squash will have pale flesh and a watery consistency. This test gives you immediate feedback to adjust your harvest timing for future squash.
Remember that proper harvest timing directly impacts storage life. Squash harvested at peak ripeness can store for 2-3 months in cool, dry conditions, while prematurely harvested squash spoils quickly. The effort to wait for these visual cues pays off in both flavor and longevity.
As you become more familiar with these harvest indicators, you'll develop an instinct for the perfect moment. I still check all three signs every time, but now I can often tell just by looking.
That's the confidence that comes with experience - knowing your garden's unique microclimate and how it affects your butternut squash development.
Best harvesting techniques to avoid damage and extend shelf life
Once your butternut squash shows those perfect harvest signs, the next step is harvesting it correctly to preserve its flavor and texture. A rough harvest can bruise the skin, inviting rot and shortening shelf life.
I’ve learned that gentle handling and proper curing are just as important as timing. The right technique ensures your squash stays fresh for months, ready to transform into soups, roasted dishes, or baked goods.
Start by choosing a dry, sunny day for harvesting—this minimizes moisture that can cause decay. Use a sharp, clean pruning shears or knife to avoid tearing the skin. Cut the squash 1-2 inches from the vine, leaving a small stem attachment to help with curing.
This small detail makes a big difference in how well your squash stores. I always remind myself: sharp tools prevent damage, and damage equals wasted squash.
Step-by-Step Harvesting Guide
- 1 Select a dry morning to harvest—this reduces moisture exposure and fungal risks.
- 2 Use a sterilized knife to cut the squash 1-2 inches from the vine, leaving a small stem stub.
- 3 Gently place squash on a soft surface (like a towel) to avoid bruising the skin.
- 4 Let squash cure in sunlight for 7-10 days—this hardens the skin and extends shelf life.
- 5 Store cured squash in a cool, dry place (50-55°F) with good airflow to prevent rot.
After harvesting, your squash needs time to cure properly. Place it in a warm, well-ventilated spot (like a porch or garage) for 7-10 days. This curing process thickens the skin, making it more resistant to damage and pests.
I always avoid storing squash in the fridge until it’s fully cured—cold temperatures during curing can lead to soft spots. Once cured, move your squash to a cool, dark place with good airflow, like a basement or pantry.
Proper storage is key to extending shelf life. Keep squash in a single layer (not stacked) to prevent bruising. A well-ventilated cardboard box or wooden crate works perfectly. Check squash weekly for any signs of soft spots or mold, and remove affected ones immediately to prevent spreading.
With the right curing and storage, your butternut squash can last 2-3 months—sometimes even longer if conditions are ideal.
If you’re planning to store squash long-term, consider freezing or canning portions after curing. Freezing is simplest: cut into chunks, blanch for 2 minutes, then freeze in airtight bags. Canning requires more effort but preserves flavor for up to a year.
I’ve found that peeling and seeding squash before freezing makes it even easier to use later. Whether you store whole or prepped, the goal is to preserve that harvest freshness for as long as possible.
Remember, every squash is unique—some varieties store better than others. For example, Waltham Butternut tends to last longer than Long Island Cheese. Pay attention to your specific variety’s traits and adjust your storage methods accordingly.
With these techniques, you’ll enjoy homegrown squash well into winter, making your garden’s bounty last all season long. Happy harvesting! 🎃