
Picking
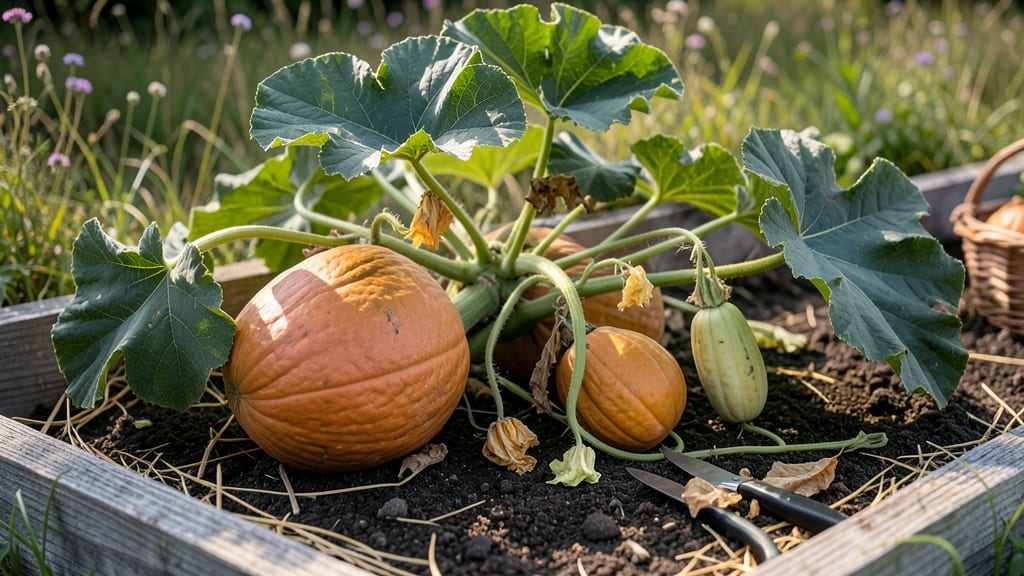
To pick butternut squash from your garden at the perfect moment, watch for a hard rind, deep tan color, and dried stem 🎃 — timing can make all the difference between a sweet harvest and a bland one.
Picture this: you’ve nurtured your butternut squash all season, and now the moment of truth arrives. One wrong move, and you could end up with squash that’s either too soft or past its prime. Knowing the exact cues ensures you get the best flavor and texture from your hard work.
Beyond visual clues, factors like your local first frost date and the squash’s size play a role. A mature butternut should feel heavy for its size and have a dull, not shiny, skin. Ignore these signs, and you might miss the window before cold weather sets in.
In this guide, I’ll walk you through the three key indicators of ripeness, how to test for doneness, and the best time of day to harvest for maximum storage life. By the end, you’ll never second-guess when to pluck your butternut squash again.
3 Key visual and physical signs your butternut squash is ready to harvest
Harvesting butternut squash at the perfect moment transforms your garden into a treasure trove of sweet, nutty flavor. The key lies in observing three critical visual and physical signs: rind color, skin hardness, and stem condition.
Ignoring these cues often leads to overripe squash that’s stringy and bland—so let’s dive into what to look for when your butternut squash is begging to be picked.
First, pay attention to the rind color. When ripe, butternut squash develops a deep tan or beige hue that’s dull—not shiny. A green or yellowish rind means it’s not ready yet, while a pale, almost white rind signals overripeness.
This color shift is your first clear indicator that the squash has reached peak sweetness.
Next, check the skin hardness by pressing your thumbnail into the rind. If it doesn’t dent easily and feels firm to the touch, your squash is ready. A soft or spongy rind means it needs more time on the vine.
This test is foolproof—no guesswork involved! Overripe squash will have a wrinkled or leathery skin, so act quickly once you spot that dull tan color.
The stem condition is another game-changer. A ripe butternut squash will have a dry, brown stem that often detaches on its own or with gentle tugging. If the stem is still green and flexible, your squash needs more time.
A completely detached stem isn’t a deal-breaker—it just means the squash was ready earlier—but a green stem guarantees a less flavorful harvest.
Don’t overlook the weight of the squash as a secondary clue. A fully ripe butternut squash feels heavy for its size because it’s packed with sweet flesh. Lift a few candidates to compare—you’ll notice the ripe ones are noticeably denser and heavier than their underripe counterparts.
This trick works especially well when you’re unsure about the rind or stem.
Timing is everything, so avoid the first frost trap. Butternut squash can’t handle frost, so harvest before temperatures drop below 28°F (-2°C). If your squash isn’t ready by frost season, you’ll need to pick it earlier than ideal and cure it indoors to improve flavor.
Always prioritize visual cues over calendar dates—your squash will thank you with better taste and texture.
One common mistake is waiting too long because you think "bigger is better." Butternut squash won’t sweeten further once fully ripe—they’ll just become stringy and mealy. Overripe squash also absorbs more water, diluting their natural sweetness.
When in doubt, harvest a few squash early to test their readiness—you can always leave others on the vine for another week if needed.
Pro tip: Use a sharp pruning shear to cut the stem, leaving a 1-inch stem attachment on the squash. This helps prevent rot during storage.
After harvesting, let your squash cure in a warm, dry place (like a sunny windowsill) for 7–10 days to develop its full sweetness and harden the skin further.
Mastering these three signs—rind color, skin hardness, and stem condition
How to test butternut squash ripeness: the seed and skin method explained
When it comes to harvesting butternut squash, timing is everything. Unlike some vegetables, you can't just pick them when they're big enough—you need to check for specific ripeness indicators to ensure maximum flavor and texture.
The two most reliable methods focus on the skin and the seeds inside. These simple tests will help you avoid the disappointment of underripe or overripe squash.
First, let’s talk about the skin. A ripe butternut squash will have a hard, dull rind that’s difficult to pierce with your fingernail. If the skin is still soft or greenish, it’s not ready yet.
The color should also deepen to a tan or beige hue, losing its bright green or yellow tint. This change signals that the squash has reached peak sweetness and is ready to harvest.
⚠️ WARNING: Overripe Squash Pitfalls ⚠️
Next, inspect the seeds inside the squash. Cut open a sample squash (or a smaller one if you’re unsure) to check the seed color. When fully ripe, the seeds will turn a deep brown or black. If they’re still white or light-colored, the squash needs more time on the vine. This seed test is especially useful for larger squash varieties, where external signs might be harder to spot.
Don’t forget to check the stem. A ripe butternut squash will have a dry, brown stem that detaches easily from the vine. If the stem is still green and flexible, the squash isn’t ready yet.
This is a critical sign, as it indicates the squash has fully matured and is at its peak flavor. Combine this with the skin and seed tests for the most accurate ripeness assessment.
Your growing conditions also play a role in determining the best time to harvest. In warmer climates, butternut squash may ripen faster, so check for these signs 85-90 days after planting.
In cooler regions, it might take up to 120 days. Always harvest before the first frost, as cold temperatures can damage the squash and reduce its storage life.
Once you’ve confirmed ripeness using these methods, harvest your butternut squash with a sharp knife or pruners, leaving a few inches of stem attached. This helps extend the squash’s shelf life and preserves its flavor.
Store it in a cool, dry place for up to three months, and you’ll enjoy homegrown sweetness all season long.