
Picking
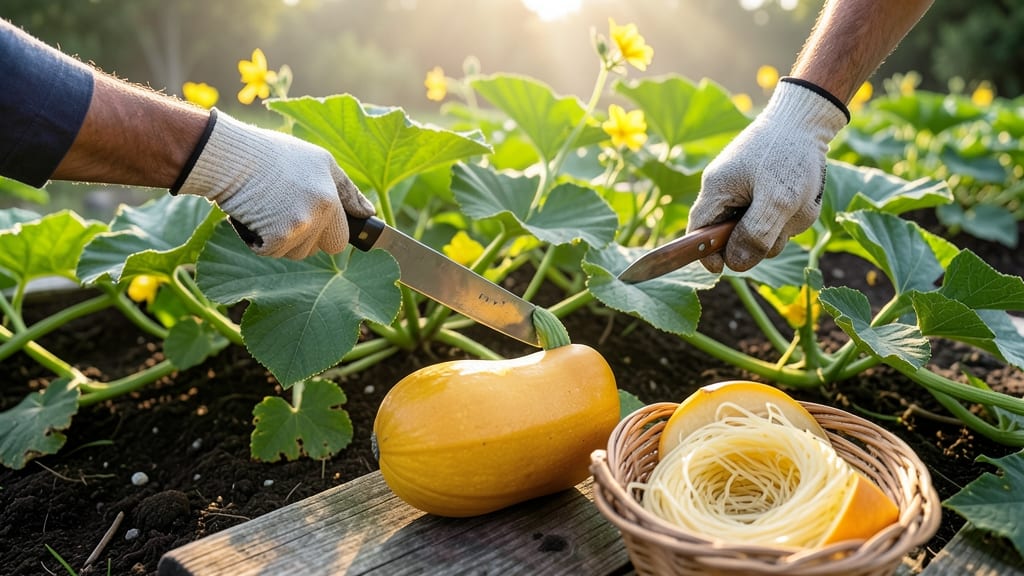
To pick spaghetti squash from your garden at the perfect moment means the difference between tender, string-free strands and a tough, flavorless mess.
Harvesting too early turns your squash into a bland, stringy disappointment—like waiting for a cake to bake but pulling it out at the timer’s first ding. Too late, and the flesh becomes dry and woody, no matter how much you roast it.
The golden window is narrow, but these three foolproof signs will tell you exactly when to grab your knife.
First, check the rind: it should turn from green to a dull, matte yellow—like the skin of a ripe banana. Then, press your thumbnail into the squash. If it doesn’t leave a dent, it’s ready.
Finally, look at the stem: when it starts drying out and the vines yellow, that’s your cue to harvest before the first frost sneaks in.
Below, I’ll walk you through each step, including the best time of day to pick and how to store your squash so it stays fresh for weeks. No more guesswork—just perfect, restaurant-worthy spaghetti squash straight from your garden.
3 Visual signs your spaghetti squash is perfectly ripe for harvesting
Picking your spaghetti squash too early means tough, stringy strands when cooked, while waiting too long can lead to overripe flesh that’s watery and bland. The key to peak flavor and texture lies in three simple visual cues: rind color, skin hardness, and vine condition.
Mastering these signs ensures you harvest at the perfect moment, just like a professional grower.
First, focus on the rind color. When fully ripe, the skin transitions from bright green to a dull golden yellow. This color shift signals the squash’s starches have converted to sugars, creating that signature tender, sweet flesh.
If the rind still has green patches, it’s not ready yet—those spots indicate the squash needs more time on the vine.
Next, check the skin texture with your thumbnail. Press firmly near the stem—if the skin resists penetration and feels tough, your squash is ripe. But if it gives way easily, the flesh is still developing.
This simple test saves you from cutting into an underripe squash that’ll turn out grainy and unappetizing when cooked.
Finally, observe the vine and leaves. When the vines start yellowing and dying back, it’s a clear signal that the squash is nearing peak ripeness. Healthy green vines mean more time is needed, while browned or crispy leaves suggest you’ve waited too long.
Balance these cues to avoid harvesting too late, which can make the flesh overly fibrous.
Size alone isn’t a reliable indicator—some spaghetti squash varieties mature larger than others. Instead, combine all three cues: a dull yellow rind, hard skin, and yellowing vines.
For example, my ‘Golden Nugget’ squash reached perfect ripeness at about 90 days with a rind the size of a football, but its color and texture were the true giveaways.
Regional variations can affect ripening speed. In warmer climates like Zone 9, squash may ripen faster and require earlier harvesting, while cooler zones like Zone 5 might need an extra week or two.
Always prioritize the visual cues over calendar dates to ensure the best flavor. If you’re unsure, err on the side of waiting—overripe squash stores better than underripe ones.
One common mistake is harvesting based on size comparisons with store-bought squash. Homegrown varieties often mature differently, so focus on the color and texture rather than dimensions. For instance, my ‘Honeynut’ squash stayed small but developed the perfect golden rind and firm skin at 85 days, proving size isn’t everything.
Once you’ve confirmed ripeness, harvest on a dry morning to allow the squash to cure slightly before storage. Cut the stem with a sharp pruner, leaving a 1-inch stem attachment to prevent rot.
Store in a cool, dry place for up to 3 months, or cook immediately for the best texture and flavor.
How to test spaghetti squash ripeness before cutting: the thump and stem check
Even when your spaghetti squash looks close to harvest, visual cues can be misleading. That’s why I rely on two foolproof tests before cutting: the thump test and the stem check.
These methods reveal the real maturity of your squash, saving you from stringy, underripe flesh or overripe squash that’s past its prime. The best part? They take less than 30 seconds each.
Start by selecting a healthy-looking squash with a mostly yellow rind. Hold it gently—if it feels too light for its size, it’s likely not ready. The thump test comes next, where a hollow, deep sound confirms maturity.
But don’t skip the stem check, as this is where many gardeners make costly mistakes by harvesting too early. Let’s break down each test step by step.
⚠️ callout-warning
Many gardeners pick spaghetti squash when the rind turns yellow, but this isn’t enough! Underripe squash will have stringy, bland flesh and won’t store well. Always confirm with the thump test and stem check—skipping these leads to wasted effort and poor flavor.
💡 Pro Tip: If your squash passes both tests but still looks green, wait 3-5 more days for full ripeness.
The thump test is simple: hold the squash with one hand and thump it firmly with your knuckles. A ripe spaghetti squash will produce a deep, hollow sound, almost like knocking on a wooden door. If it sounds dull or flat, it’s not ready yet.
This test works because mature squash has fully developed seeds and fibrous strands, creating that signature echo. For best results, test multiple squash from the same vine—they often ripen at slightly different times.
Next, examine the stem where the squash attaches to the vine. A ripe spaghetti squash will have a stem that’s dry, brown, and slightly shriveled. If the stem is still green or moist, your squash needs more time.
Some gardeners worry about twisting the stem off, but with a clean cut using pruning shears, you’ll avoid damaging the plant. Leave about 1 inch of stem attached to the squash—this helps extend its shelf life after harvest.
One mistake I’ve seen often is harvesting based solely on color changes. While a dull yellow rind is a good sign, it doesn’t guarantee ripeness. For example, squash grown in cooler climates may stay partially green even when fully mature.
That’s why combining the thump test with the stem check gives you the most accurate results. Once you’ve confirmed ripeness, harvest on a dry morning to let the squash cure for a few days in a warm, dry place before storage.
After harvesting, store your spaghetti squash in a cool, dark place (around 50-55°F) where it can cure for 7-10 days. This curing process enhances flavor and texture.
If you’re unsure whether a squash is ready, err on the side of waiting—overripe squash won’t improve, but underripe ones can still ripen on the vine with proper care. With these tests, you’ll never second-guess your harvest again!